Confetti Chili and Cornbread Muffins

There are many reasons to hate the cold weather this time of year. A steaming bowl of chili and a sweet cornbread muffin are two reasons to be content at winter’s arrival. With a big glass of milk. 99% of the time I drink water with my meals. But milk is a perfect complement to chili and cornbread.

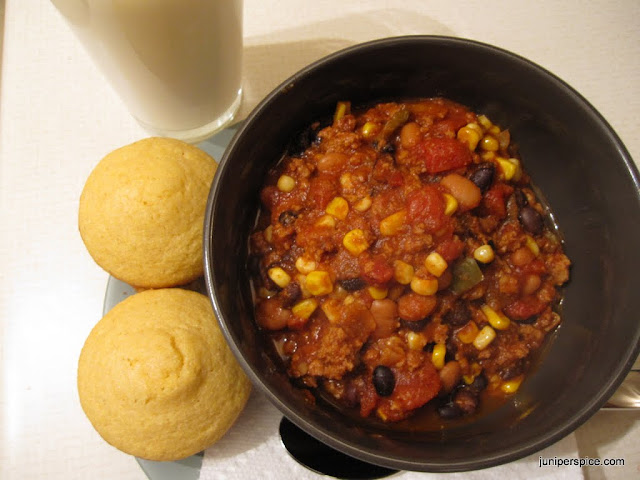
Growing up, Mom’s chili was always a treat – ground beef, tomatoes, beans – simple and delicious. But this is a little bit different version – it’s about as healthy (and optionally can easily be vegetarian) as chili can get. It’s full of colorful, delicious vegetables. We won’t hold it against the cornbread muffins for not being as healthy. They’re so delicious and crumbly and sweet.

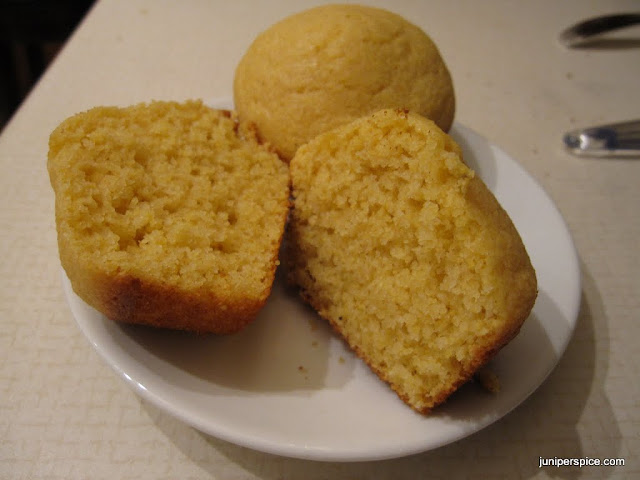
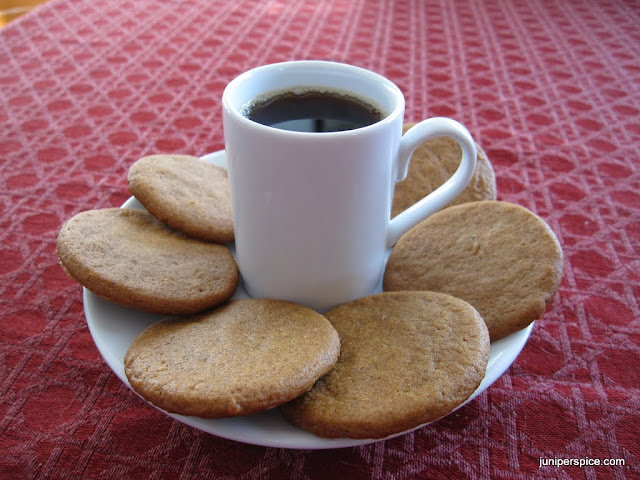
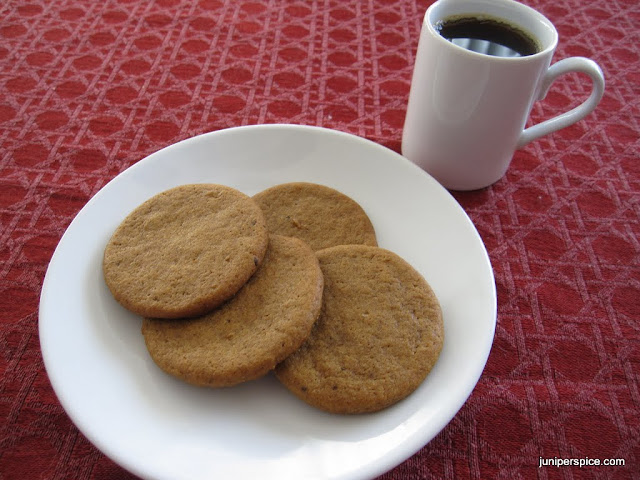
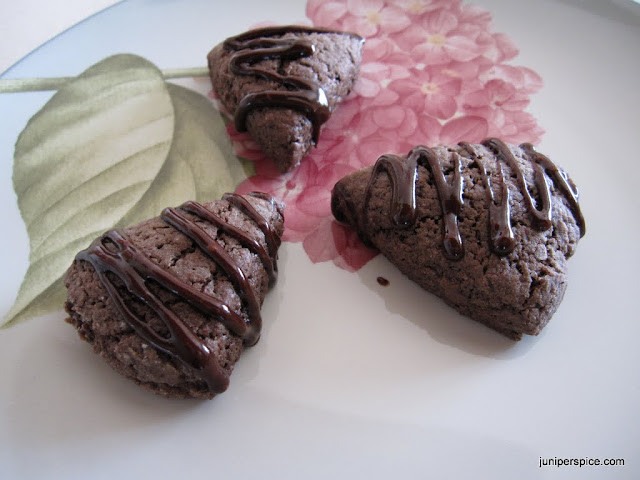
I love Famous Dave’s cornbread muffins but I can’t always have ribs and coleslaw and all the other barbecue-y goodness that entails *homer-simpson-drool*. These muffins are appropriately sweet without being overpowering. They’re crumbly and soft and delicious straight out of the oven. Leftovers won’t last long.

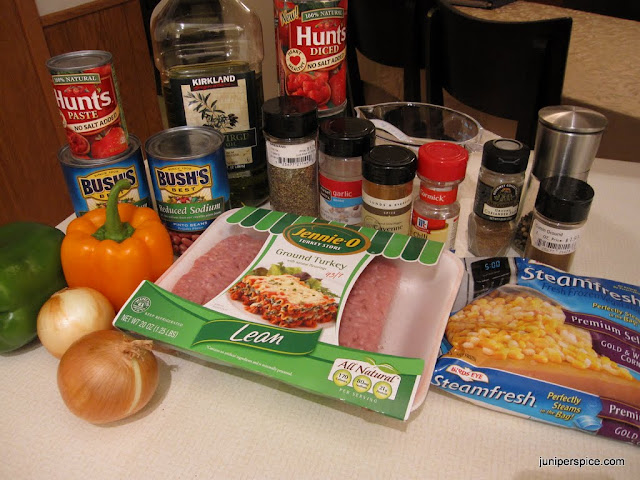
The ingredient lists look long but these recipes are actually very simple – don’t be intimidated.

The chili recipe is inspired from Recipe Girl’s Confetti Chili and the cornbread muffins are adapted from All Recipes.

Confetti Chili, makes about 7 – 1 1/4 cup servings

Printable Recipe

  • 1 – 2 tbsp. olive oil, divided (start with 1 tbsp., adding more as necessary)
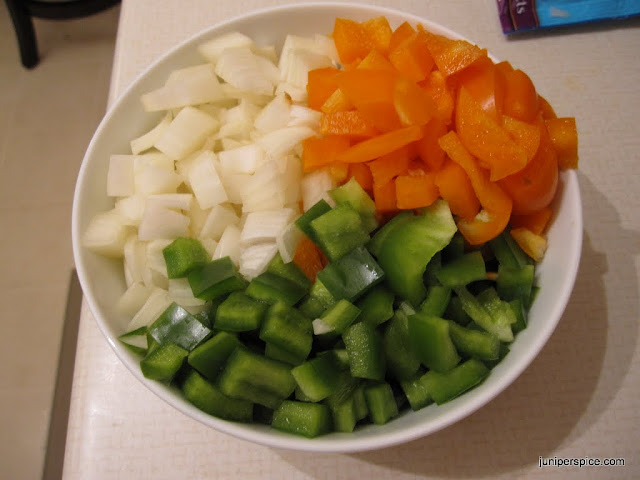
  • 1 medium yellow onion, chopped
  • 1 green bell pepper, chopped
  • 1 orange/red bell pepper, chopped (you can use 2 green peppers if you want but the orange/red have a sweetness about them that really adds to the recipe)
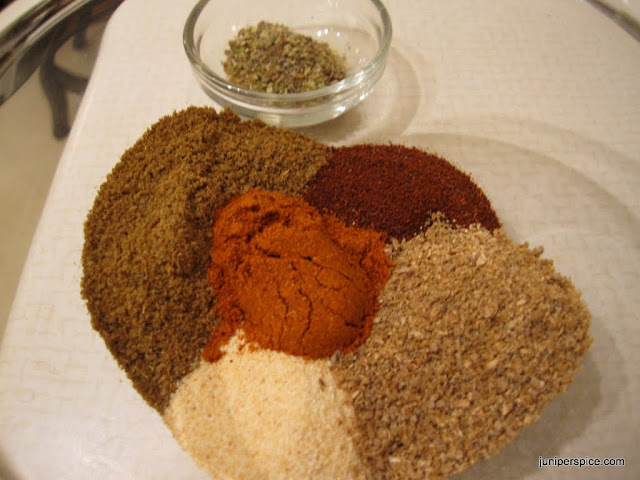
  • 2 tbsp. cumin, ground
  • 1 tbsp. garlic powder
  • 1 tbsp. chili powder
  • 2 tsp. coriander, ground
  • 1/2 – 1 tsp. cayenne pepper, ground (add more/less depending on your heat preferences)
  • 1 – 20 oz. package lean ground turkey
  • 2 – 14 oz. cans diced tomatoes, no salt added
  • 1 – 6 oz. can tomato paste, no salt added
  • 1 – 4 oz. can chopped green chiles (optional – I add cayenne instead because I prefer an overall ‘heat’ to little, unexpected bites of heat)
  • 1 tsp. dried oregano
  • 1 – 15.5 oz. can low-sodium black beans
  • 1 – 15.5 oz. can low-sodium pinto beans (you can use kidney in place of these or the black beans if you prefer – I never find a low-sodium version of kidney beans though)
  • 1 – 10-12 oz. package frozen corn (about 2 – 2 2/3 cups corn, depending on your love of corn)

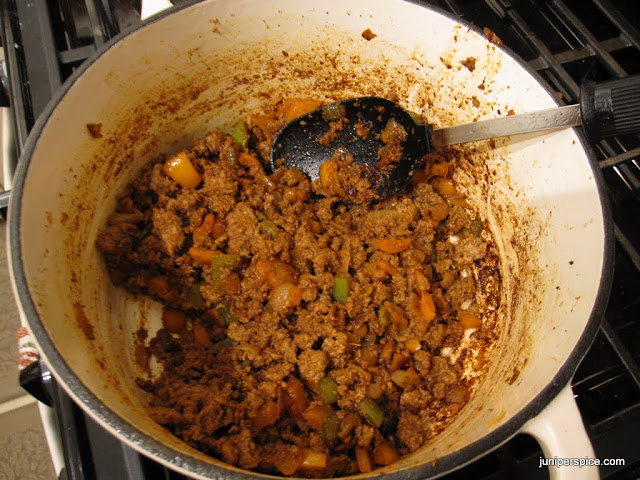
1. In a large pot or a wide, deep pan, heat oil over medium heat. Add onion and bell peppers; stir to coat with oil. Saute until soft, about 10 minutes, stirring occasionally. Add additional oil if necessary, pouring slowly to the side of your pot and then stirring in.


2. Add cumin, garlic powder, chili powder, coriander, and cayenne and stir to coat veggies. Cook for about 1 minute, stirring constantly.


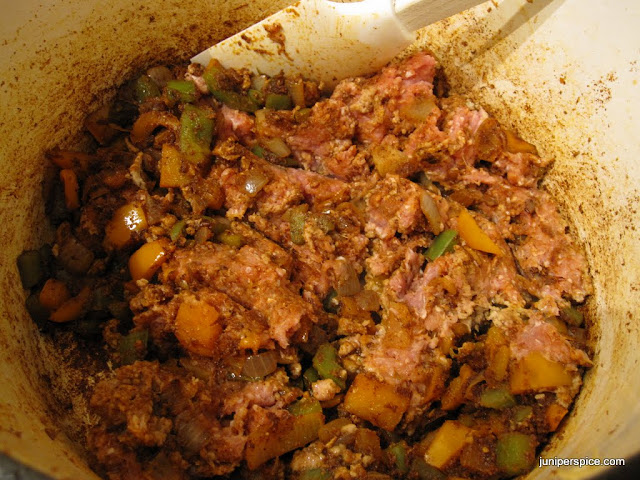
3. Push veggies to the sides of the pot. Add ground turkey to the middle, breaking up with a spoon. Increase temp to medium-high and stir meat and veggies together. Stir occasionally until meat is cooked, about 10 minutes. It may be hard to tell when it’s cooked with all of the spices in the pot.


4. Add the tomatoes, tomato paste, chiles (if using), water, and oregano. Stir until well combined and bring to a boil. Reduce heat to medium-low and let simmer, partially covered, stirring occasionally and cook for about 30 minutes.


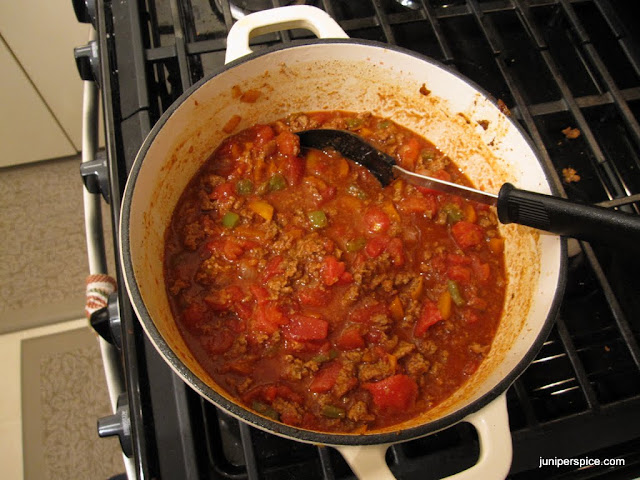
5. Stir in the beans and frozen corn. Continue cooking, partially covered, for about 15-20 minutes at least. You can let the chili simmer on low for a while longer to let the flavors mix, but I am never patient enough for this.


Recipe makes about 9-10 cups. As written, 1 1/4 cup serving is about 350 calories, 1 1/2 cups about 415 calories, and 1 cup about 275 calories.

Sweet Cornbread, makes 12 muffins

Printable Recipe

  • 1/2 cup white whole wheat flour (you can use regular whole wheat as well)
  • 1/2 cup unbleached all-purpose flour (you can sub in all-purpose for the whole wheat if you prefer)
  • 1 cup yellow cornmeal
  • 1/3 cup white sugar
  • 1 tsp. salt
  • 3 1/2 tsp. baking powder
  • 1 egg, slightly beaten
  • 1 cup milk
  • 1/3 cup canola oil (you can use vegetable if you prefer)
  • 1 tsp. vanilla extract
  • 2 tsp. honey

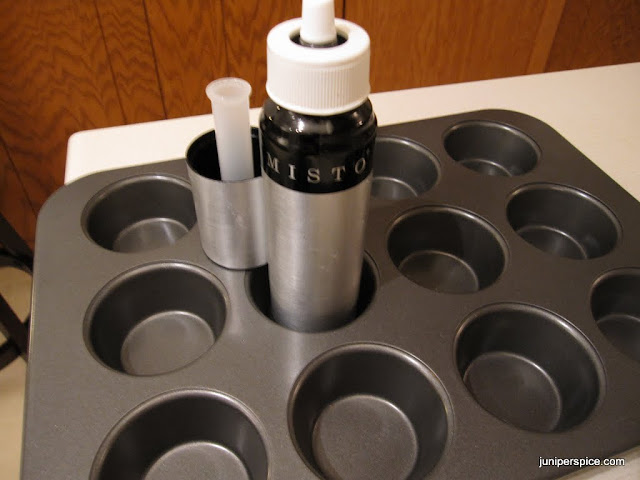
1. Preheat oven to 400°. Lightly grease a 12-cup muffin pan or line with paper liners. Sometimes paper liners work best…


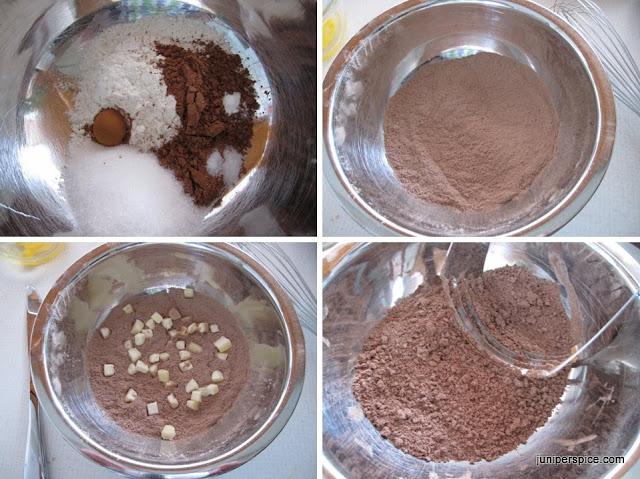
2. Combine the flours, cornmeal, sugar, salt, and baking powder in a large bowl. Whisk together and set aside.


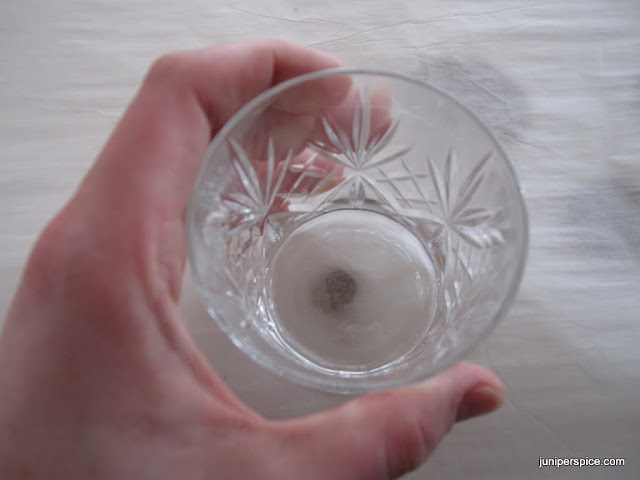
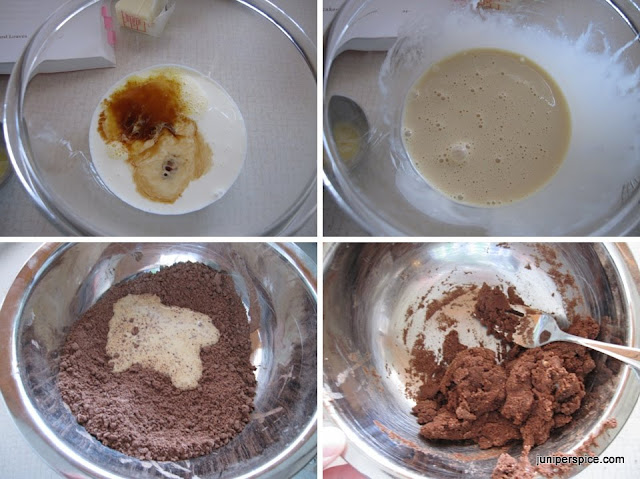
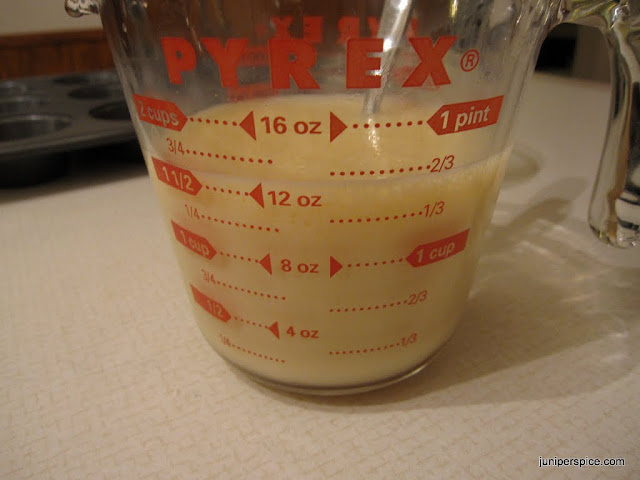
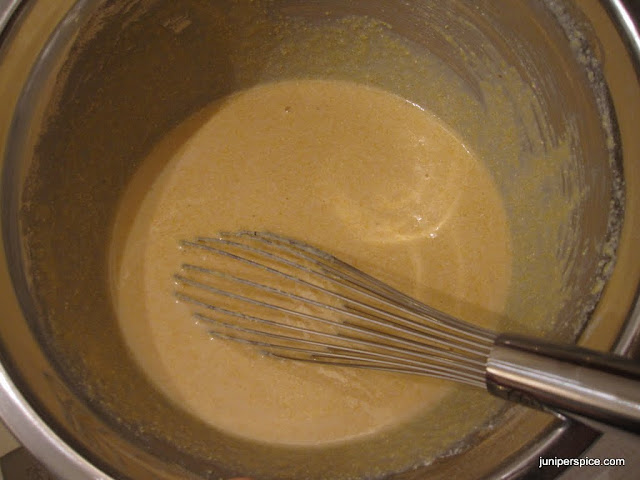
3. In a medium bowl, or as I prefer, in a 2-cup measuring glass, measure 1 cup milk, add 1/3 cup oil. Add the beaten egg, vanilla, and honey. Whisk until well combined.


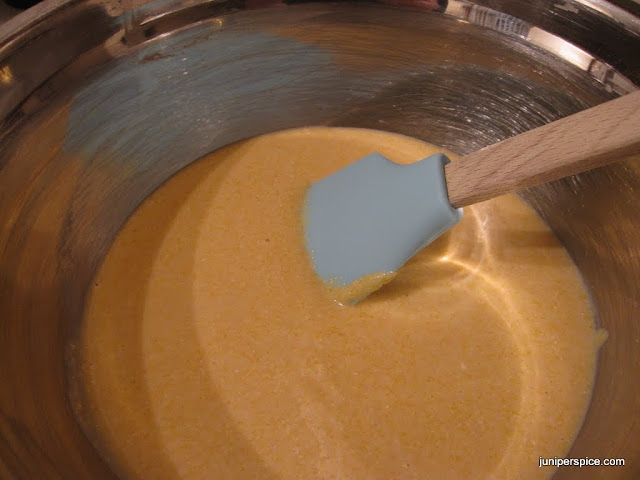
4. Make a slight well in the dry ingredients. Add wet ingredients and mix until no lumps remain. And this is why everyone should have a good, fine-edged silicone spatula. ❤


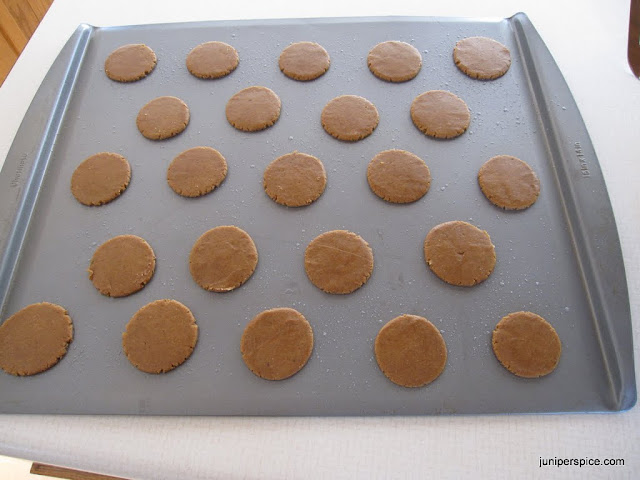
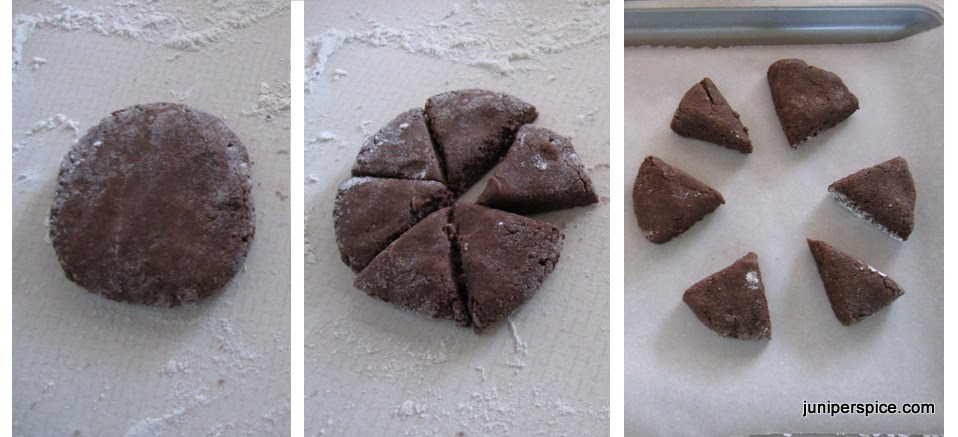
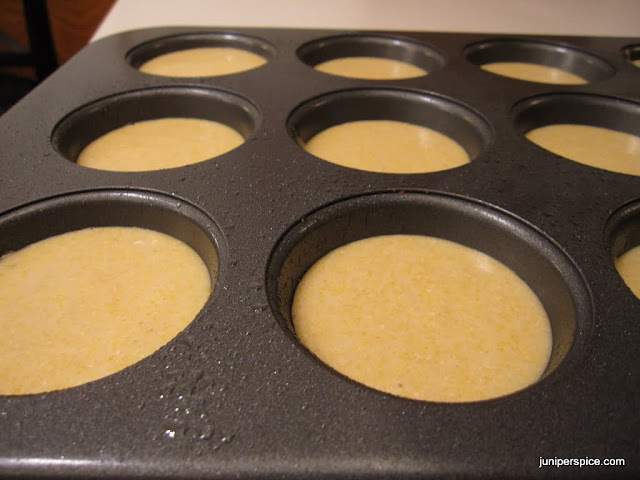
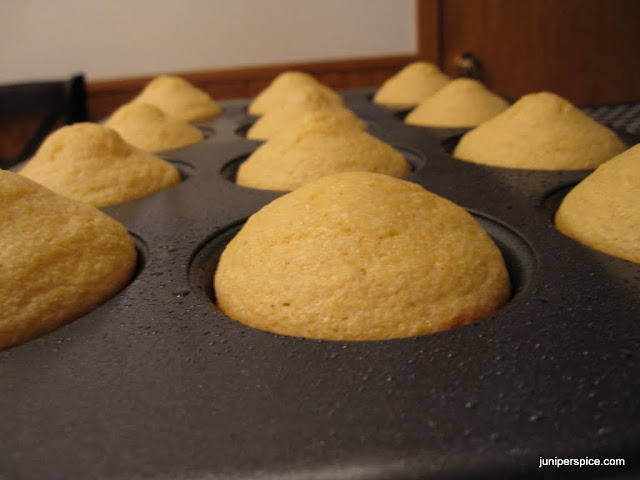
5. Using a 1/4 cup measuring cup, fill each of the muffin cups approx. 3/4 full. You’ll have big, domed cornbread muffins.

6. Bake in preheated oven for 12-14 minutes, or until toothpick inserted in center of a muffin comes out clean. (My stove bakes them perfectly at 13 minutes but you’ll want to check at 12.)

One muffin is about 165 calories.

If you make this, let me know what you think. It’s one of my favorite “cold weather” dinners and I’ve been making it for a few years, tweaking as I go.

Thanks for reading! If you like what you see, please consider following my blog, either by e-mail, Twitter, or RSS feed, to the right of this post. →

Pepparkakor (Swedish Gingersnaps)

No that’s not a giant cookie, it’s a mini espresso cup! The cookies are only about 2″ across. This is my second attempt at new Christmas cookie recipes for the year. I think they turned out great and I got top props from Hermit – he couldn’t stop eating them :D.

One day while I was at work – bored out of my mind – I stumbled across a Scandinavian cookie baking class. While I recognized the value of the class, I didn’t think it would be worth $75 for me to attend. Instead, I took note of some of the unfamiliar cookies and utilized Sir Google to help me out. While searching for Pepparkakor, I stumbled upon the blog Anne’s Food, a cooking/baking blog from Anne, who lives in Stockholm, Sweden.

I know you can buy these cookies at Ikea and they’re good – I’ve tried them. But I wanted to see if I could duplicate the crisp, semi-spicy, sweetness of these cookies.

The recipe I found was for “at least 10 dozen cookies” – which was way too much for my first batch. So, I broke out the kitchen scale – everything was in grams instead of cups, etc. – which is always fun to measure sugar and flour, etc.

Pepparkakor, adapted from Anne’s Food

Printable Recipe

This dough should sit in the fridge at least overnight – if not for a week or more – to age the spices in the dough. For this recipe, I let half the dough sit for 24 hours and the rest for a week, as a test.

Yield: 5 dozen cookies (halved from original recipe)

  • 1 tbsp. ground cinnamon
  • 1/2 tbsp. ground ginger
  • 1/2 tbsp ground cloves
  • 1/2 tsp. ground cardamom
  • 1/4 tsp. ground allspice
  • 1/2 tsp. salt
  • 1/2 tbsp. baking soda
  • 11 tbsp. unsalted butter, softened
  • 125 grams white sugar (~ a little less than 2/3 cups)
  • 75 grams brown sugar (~ 1/3 cup + 1 1/2 tbsp.)
  • 1/2 small egg (~2 tbsp. mixed egg)
  • the zest of half a lemon (~ 1 1/2 tbsp.)
  • 150 ml light molasses (~5 liquid oz.)
  • 150 ml heavy cream (~5 liquid oz.)
  • 550 grams all-purpose flour (~ 4 1/3 cups, sifted + about 1 tbsp.)

Day One:

1. In a small bowl, whisk together the spices, salt, and baking soda. In medium bowl, measure out flour, add spice mixture, and whisk together.


2. In a large bowl, cream together butter and sugars until fluffy and well mixed. Add the egg and mix thoroughly.


3. Add the lemon zest, molasses, and cream to the butter mixture and beat until well combined.

4. Add the flour mixture to the wet ingredients and mix well. The dough will be fairly sticky at this point.


5. Divide the dough evenly into 4 parts. Create disk shapes and wrap well in wax paper. Chill at least overnight or up to a week or two, to age the spices.

Day Two:

As with all traditional recipes for gingersnaps, you can roll out the dough (with either lots of flour or between 2 sheets of parchment or waxed paper) and use cookie cutters to create your shapes. Or, if you’re like me, and you suck at rolling cookies and feel like tearing your hair out at the thought, you can easily make circular cookies this way.

1. Preheat oven to 350°. Remove one disk of dough from the refrigerator at a time. Line your cookie sheet with parchment paper or grease well.

2. Using a 1 tsp. measuring spoon – or eyeballing it – cut off a chunk of dough. You want the cookies to be almost the same size as each other and the same thickness so they all bake evenly and none are burnt before the others are done.


3. You can do this one cookie at a time or you can measure out your cookies/dough balls all at once. The cookies should be about 1- to 1 1/2″ apart on the tray; the dough balls should be placed ~ 2″ apart.

4. Place the dough on the cookie tray, lay a piece of waxed or parchment paper over the dough, and press down firmly with a flat bottomed glass or other implement. You want to make sure and press evenly on all sides of the glass so your cookie is the same thickness throughout. Press down until the cookie is about 1/8″ thick.


5. Bake in the oven for 6 – 7 minutes. Mine were done right around 6 1/2 minutes. You don’t want the bottom to start browning or the cookies take on more of a burnt taste.

6. They’ll be a little soft when you remove them from the oven. Let the cookies cool on the tray for 30 seconds or so and then transfer to a rack. This is where parchment paper is wonderful – you can just (carefully) move the entire piece of parchment to a cooling rack and don’t have to worry about ruining your cookie shapes by using a spatula.

Also, these made a great base for a gingersnap crust. Unfortunately, I didn’t take pictures of the end result – Banana Cream Pie. *sadface*


Viennese Crescents

It’s that time of year again. Narrowing down the Christmas cookie list!

I am always way too optimistic with the number of new recipes I’ll be able to test. I always run out of time before I get to them all. Oh well, I’m a perpetual optimist 😀

One of my favorites cookie/desert cookbooks is the Joy of Cooking All About Cookies cookbook. There aren’t any recipes in here that you can’t find in the Joy of Cooking, but a good 75% of those in this supplement have big glossy pictures. Always helpful in finding a new recipe. (I also have the All About Vegetarian, which is another good resource when you want to have a good look at what you’re about to make.)

I wasn’t quite positive how these would turn out – they have only 5 ingredients. They were a big hit though, especially with Hermit. I thought they tasted similar to Russian Teacakes – which have walnuts chunks and are rolled in powdered sugar after baking – and are some of my favorite holiday cookies.

The only nuts I bake with are almonds, and only those which haven’t come in contact with other peanuts/tree nuts. Hermit’s niece is highly allergic to peanuts and it wouldn’t do to risk accidentally contaminating something. Thankfully, with a little creativity, I’ve found many cookies which don’t call for nuts. Last year, I actually made Peanut Blossoms with Soy butter instead of peanut butter. They turned out pretty well. I’d like to try this with an almond butter as well.

I love how soft-crunchy these were. I might try making smaller – i.e. not crescent shaped – round cookies from this recipe to see how they turn out. I love a bite-sized cookie. 🙂

Viennese Crescents

Printable Recipe
  • 1/2 pound (2 sticks) unsalted butter, softened
  • 3/4 cup powdered sugar
  • 2 tsp. vanilla extract
  • 1 cup ground blanched almonds* (or ground walnuts)
  • 2 cups all-purpose flour
  • 2/3 cup powdered sugar, for dusting

Instructions:

1. Place a rack in the upper 1/3 of the oven and preheat to 350°. Grease cookie sheet or line with parchment paper and set aside.

2. In the bowl of a stand-mixer, beat butter until pale and creamy. Sift powdered sugar over the top and beat until well combined.

3. Stir in vanilla extract and ground almonds. Gradually – gently – incorporate flour until all combined.

4. Remove bowl from mixer stand. If necessary, knead dough slightly until well blended.

5. Pull off chunks about 2 tsp. in size and roll gently into a compact ball. I have a (very handy) 2 tsp.-sized cookie scoop that works great.

6. Shape ball into a log and then curve slightly into a crescent shape. Place on prepared pans, 1 1/4 inches apart.

7. Bake one sheet at a time, about 10-12 minutes, flipping the cookie sheet halfway through baking. Take the cookies out when they’re very slightly browned. They taste better when they’re lighter in color.

8. Let the cookies rest on the cookie sheet until slightly firm. Remove to racks to cool.

9. Sift/dust powdered sugar over cookies while still slightly warm. Once cooled, store in an airtight container.

Bite-Sized Cinnamon Chocolate Scones

I seriously love these things. They’re one bite of crumbly, chocolaty, soft perfection. Yum! I’m kind of addicted to baking mini portions. Just a little addicted (heh, get it? mini, little…). Scones, pies, cookies, cakes… yup, addicted to mini versions of all of those.

These little guys are adapted from Small-Batch Baking for Chocolate Lovers. I love these Small-Batch Baking books – you can eat an entire recipe (or share with your husband, if you do that sort of thing…) and not feel horrible. Also, it helps not having multiple dozens of something sitting around the house.

The original recipe is for 3 regular-sized scones. I made 12 bite-sized scones because they’re so much prettier and delicate. And because I can.

I hear people either like cinnamon with chocolate or they don’t. Hermit said they were ‘dry’ tasting because of the cinnamon. I loved them though. It adds another dimension of flavor I think.

Bite-Sized Cinnamon Chocolate Scones

Printable Recipe

Scones:

  • 1/2 cup all-purpose flour
  • 2 tbsp. sugar
  • 2 tbsp. unsweetened cocoa powder
  • 1/2 tsp. ground cinnamon
  • 1/8 tsp. baking soda
  • 1/8 tsp. salt
  • 2  tbsp. cold unsalted butter, diced
  • 1 tbsp. well-beaten egg (note: There are about 4 tbsp, or ¼ cup, in one beaten egg)
  • 2 tbsp. heavy (whipping) cream
  • 1/2 tsp. pure vanilla extract
  • Coarse sugar, to sprinkle on the tops (optional)

Cinnamon Chocolate Glaze:

  • 3 tbsp. semisweet chocolate chips
  • 2 tsp. unsalted butter
  • 2 tsp. hot water
  • 1 tbsp. powdered sugar
  • 1/8 tsp. ground cinnamon

Making the scones:

1. Preheat oven to 375°, place rack in middle of oven. Cover a small baking sheet with parchment paper or grease well. Set aside.

2. In the bowl of a food processor, pulse a few times: flour, sugar, cocoa powder, cinnamon, baking soda, and salt. (My food processor bowl was in the dishwasher so I did this the old-fashioned way. If you also don’t have a food processor handy, you can whisk the ingredients in a medium bowl.)

3. Add the butter pieces and pulse until coarse-looking crumbs form. (… Or incorporate with a pastry blender or two knives. )

4. Place the mixture in a medium bowl and create a well in the center.

5. In a small bowl, whisk together the egg, cream, and vanilla until blended. Add the egg mixture to the dry ingredients. Gently mix with a fork just until combined – you do not want to over mix. Your mixture should still look a bit “crumbly”.

6. Lightly flour a work surface and your hands; form two equal-sized balls with the dough. Place the dough balls on the floured surface and gently form two discs 1/2- to 3/4-inches in height. With a butter knife or pastry chopper, cut your discs in half and then in thirds, so you have 6 equal pieces.

7. If desired, sprinkle the scones with coarse sugar. With a sharp-edged spatula, gently transfer the scones to the prepared pan and space evenly. Bake the scones until they feel dry and a toothpick inserted in the center comes out clean, about 9-11 minutes.

Making the Chocolate Glaze:

1. Add the chocolate chips and butter pieces to a small, microwave-safe bowl; microwave 30-45 seconds on 50% power, until soft but not melted entirely. Whisk with a fork until smooth. Add hot water until combined; add the powdered sugar and cinnamon and mix until smooth.

2. Pour the chocolate mixture into a zip-top plastic bag; force the mixture to one corner and secure the top by twisting and holding in place. Cut a small piece off the corner of the bag and drizzle chocolate over the scones. Or spoon it right over the top, all gooey and messy. I’m too much of a perfectionist to do this. I need my deserts to be pretty before I devour them.

Scones are best eaten the same day, either warm or room temperature. And they’re really good if you eat them all in the same day. What? There are only 12 bize-sized portions. I totally didn’t eat them all the same day. It took 2 days for that. Hermit had one or two. I think.

Fluffy White Cake with Strawberries, Custard, and Whipped Cream

Welcome to my blog – first time for everything! I hope you like what you see 🙂

When it comes to sweets and desert, some people always prefer chocolate. I would gladly take a fruit-based desert a majority of the time. I know, blasphemous!

My mom happens to feel the same way. This was the recipe I came up with for her birthday this year. Her 39th birthday. Yeah.  What?

Many of my creations are the compilation of more than one recipe. This cake is no different. The original idea came from a recipe which I found in this Scandinavian cookbook. The sponge portion is adapted from allrecipes.com Fruit-Filled White Cake.

This recipe is the perfect mix of sweet, gooey, fluffy, delicate goodness. The custard oozes out of the layers with the natural strawberry syrup and the whipped cream is a perfectly light topping. Sort of like a strawberry shortcake. But with custard. And in cake form. Cakes are always better.


Fluffy White Cake with Strawberries, Custard, and Whipped Cream

Printable Recipe

This makes a (thin) 9-inch triple-layer fluffy white cake with strawberries, custard, and whipped cream.

Cake

  • ½ cup butter, at room temperature
  • 1 ½ cups white sugar
  • 4 egg whites (reserve 2 yolks, for custard)
  • 2 tsp. pure vanilla extract
  • 2 ¼ cups cake flour (for all-purpose flour, sub in 2 cups)
  • 3 tsp. baking powder
  • ½ tsp. salt
  • 1 cup milk

Custard

  • 2 egg yolks (from reserved), slightly beaten
  • 1 ½ tbsp. butter
  • 1 tablespoon cornstarch
  • 1 cup half-and-half
  • 2 tbsp. White sugar
  • 2 tsp. pure vanilla extract

Fruit filling

  • 1 pint – 1 quart fresh strawberries

Whipped topping

  • 1 ½ cups heavy whipping cream.
  • 2 tbsp. powdered sugar
  • 1 tsp. pure vanilla extract

Preparing the cake

  1. Preheat oven to 350°; grease and flour three 9-inch baking pans. Tap out any excess flour.
  2. In a large mixing bowl, cream butter and sugar until light and fluffy. Add egg whites, two at a time, beating well after each addition. Beat in vanilla.
  3. In a different bowl, whisk together cake flour, baking powder, and salt. Add to creamed mixture alternately with milk. Tip: When adding the flour and liquid parts to a cake batter, it helps to start and end with the dry ingredients (e.g.: add 1/3 the dry ingredients, then ½ the liquid, then 1/3 dry, then ½ liquid, finishing with 1/3 dry.).
  4. Evenly pour batter between the  prepared pans.
  5. Bake at 350° for 14-18 minutes. A toothpick inserted in the center will come out clean when the cakes are done.
  6. Remove pans to wire racks to cool for 10 minutes.
  7. To remove from pan, invert a dinner plate over the top of the pan. Carefully flip the pan upside down on to the plate. Set a cooling rack on top of the inverted cake (the bottom of the cake as it sits upside down) and flip over again. Let cool completely before assembling.

Make the custard filling

  1. In a small saucepan, blend the egg yolks, butter, cornstarch, half-and- half, and sugar over medium heat. Stirring constantly, cook until smooth and thickened. Stir frequently to prevent the custard from sticking or burning.
  2. Cover pan and set aside to cool. Stir vanilla into cooled custard.

Prepare the whipped cream frosting

  1.  In a medium bowl, beat cream until stiff peaks form. Beat in powdered sugar and vanilla. Voila! You have whipped cream.

Assembling the cake

Make sure the cakes have cooled completely. Place your bottom layer on a cake plate or serving platter; spread half of the custard filling onto this layer and one-third of the sliced strawberries. Place second cake layer on top of this; spoon and spread remaining custard and additional third of the strawberries. Place remaining cake layer on top. Spoon whipped cream topping over top of cake and down the sides. You’ll put approximately half of the whipped cream on the top and the other half on the sides of the cake.

Decorate the top with remaining strawberries in a single layer.

Serve immediately or refrigerate until ready to devour.

Makes 8-12 servings, depending on how much cake you’d like. And how much you like cake.

This cake is not a lie. I promise.

Also, the original recipe called for three 8-inch pans. So these layers are a little thinner but I find it to be less overwhelming than a regular triple-layer cake. Or so I tell myself because all I own are 9-inch pans? What?